Building A Test Harness With Recon
Test harnesses simplify the process of defining your invariant tests
Recon automatically builds you an invariant testing harness for any public (free version) smart contract repository or any private repository (pro version) that uses Foundry. With this you can start writing invariant tests in minutes, we’ll see how to connect a Foundry repository to have Recon build us the necessary scaffolding to do so in this post.
Building For Public Repositories
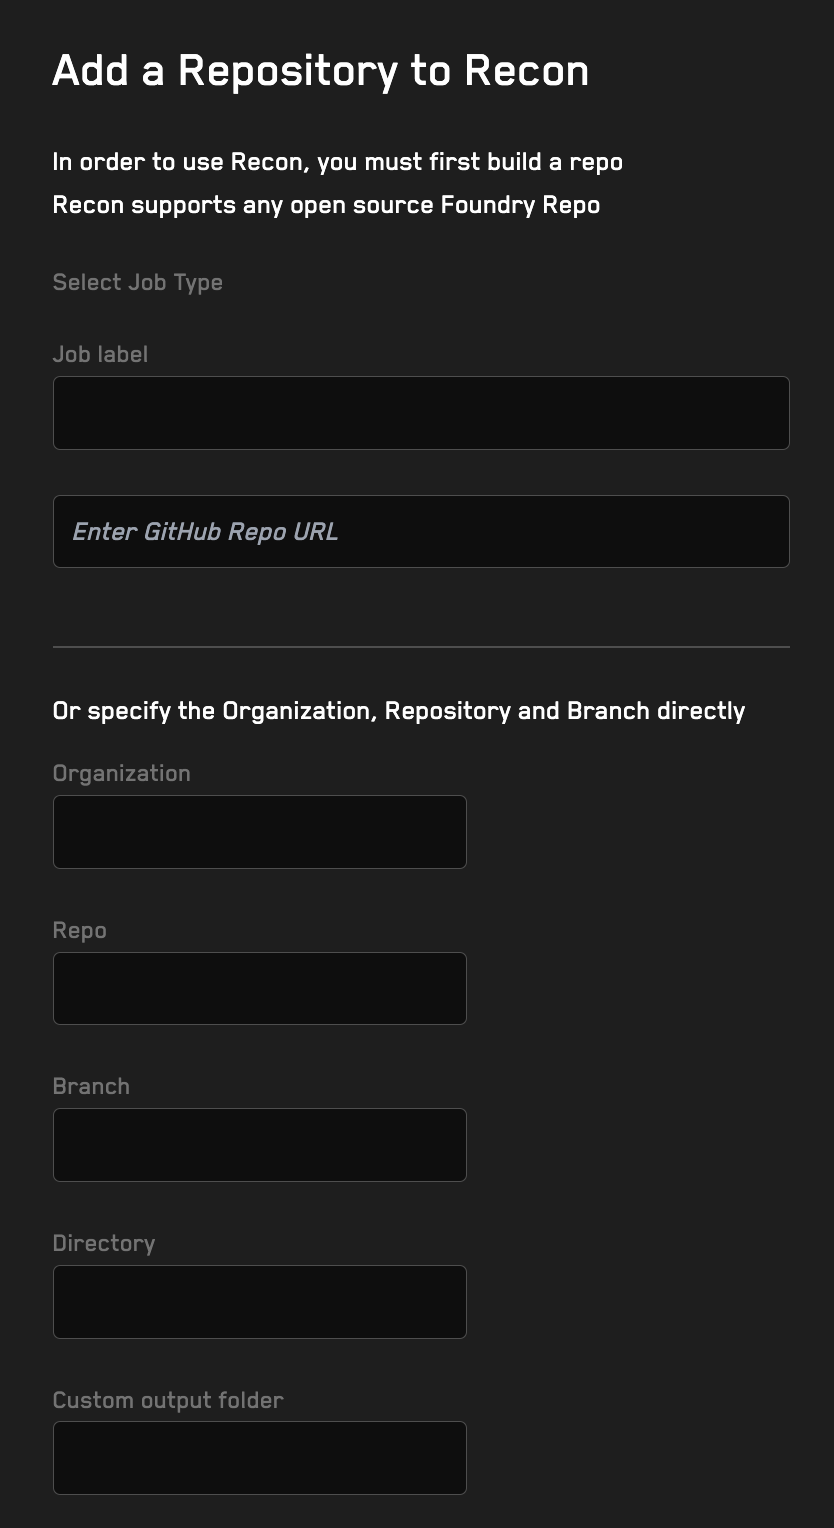
After you have your project setup with Foundry and have ensured your repository is public navigate to the Add Repos tab on the left-hand side menu. There you’ll see the following form to upload your repo and have a test harness automatically generated for it.
When using a repository where source files (smart contracts to be targeted) are located in the root directory of the default branch, all we need to do is paste the repository url in the top form field and all the subsequent fields will be autofilled for us.
Building For Nonstandard Repos
For nonstandard repositories that meet one or more of the following criteria you’ll need to specify more information in the form mentioned above:
use a branch name other than main as their default branch, or you want to add your tests to a different branch
locate their source contracts in a directory other than the root
have specified an output directory in their foundry.toml other than out
Competition repositories for platforms like Code4rena, Sherlock, etc. often use these nonstandard format repositories so we’ll use a repository from the Jala Swap competition on Sherlock to demonstrate this.
Building Non-Default Branch
For building a branch of a repository that uses a name other than main, you need to specify the branch name in the Branch field.
Source Contracts Not In Root
If the project you’re building your scaffolding for has its source contracts (where Foundry is run from) located in a directory other than the root of the repository, you’ll need to specify this in the Directory form field. If you’re unsure which directory this is, look for the directory where the foundry.toml file is located as this is where Foundry will be run from in the project.
To specify this for the Jala Swap example we’ll need to grab the name of the directory where the contracts are located, which in this case is jalaswap-dex-contract, which we add to the Directory form field
Custom Output Folder
If the project being built uses a non-default setting for the out configuration (which specifies the path to put contract artifacts in, relative to the root of the project) you need to specify it in the Custom output folder form field.
To know if this is the case for the project you’re building you’ll need to check the foundry.toml. Looking at the foundry.toml file for Jala Swap we see that the artifacts directory for the project is set to a directory called artifacts.
We then specify this in the Custom output folder form field
Running The Build
With all the needed information in place we just click the Start Job button and our build job will be submitted to Recon’s cloud service which uses the contract ABIs to generate the necessary scaffolding that we use when building our test handlers. We’ll get a notification on the bottom of the screen that we’ve successfully created a job with a unique ID string.
You’ll be able to keep track of the status of your job in the jobs info menu on the bottom right-hand side of the Public Repository page:
If a scaffolding has been built from the same repository by other users, Recon uses the existing ABI and you’ll see the following message instead and your job will be immediately accessible:
Once jobs that are run have completed they’ll show up under the Build Your Handlers tab on the left-hand side menu. When we click the tab for the Jala Swap job we’ll have options for which contracts we want to add to our testing suite. For more info on setting up the testing suite from this page see this tutorial.
Adding To Project
Installing Dependencies (Chimera)
Before adding our test scaffolding files to our project we’ll need to install the Chimera dependency to use Recon using the following command:
forge install Recon-Fuzz/chimeraAfter adding Chimera we need to add the Chimera remapping to our remappings array in our foundry.toml, for the Jala Swap example this would look like:
remappings = [
  '@chimera/=lib/chimera/src/'
]
since there are no remappings that were already defined.
Add Recon Files To Project
Now we can add the scaffolding Recon has created for us to our project using the Download all files button to add the files to our project in a directory named test, where we unzip the recon.zip file to extract our test scaffolding.
Then we just need to move the echidna.yaml and medusa.json configuration files into the jalaswap-dex-contract directory and pass in the necessary deployment parameters to the constructors of the contracts being tested in the Setup contract and we’re ready to start writing invariant tests!
Common Build Issues
Building A Private Repository
The free tier of Recon only allows building public GitHub repositories so if you try to build a private repository you’ll get the following error message:
To enable building scaffolding for private repositories upgrade to Recon Pro.
Not Specifying Custom Output Folder
If you fail to specify a custom output folder as it’s defined in the foundry.toml file for projects that use a non-default output folder of out, Recon will successfully build your project but you will encounter the following error when trying to run Echidna
You will see a similar error for Medusa. To resolve this you will need to rebuild the Recon scaffolding by following the steps above and correctly specifying your output folder in the form.
Incorrectly Specifying Branch
For repositories that use a default branch name other than main, if you fail to specify the branch name correctly in the Branch form field you will get the following error:
Branches With “/” In Name
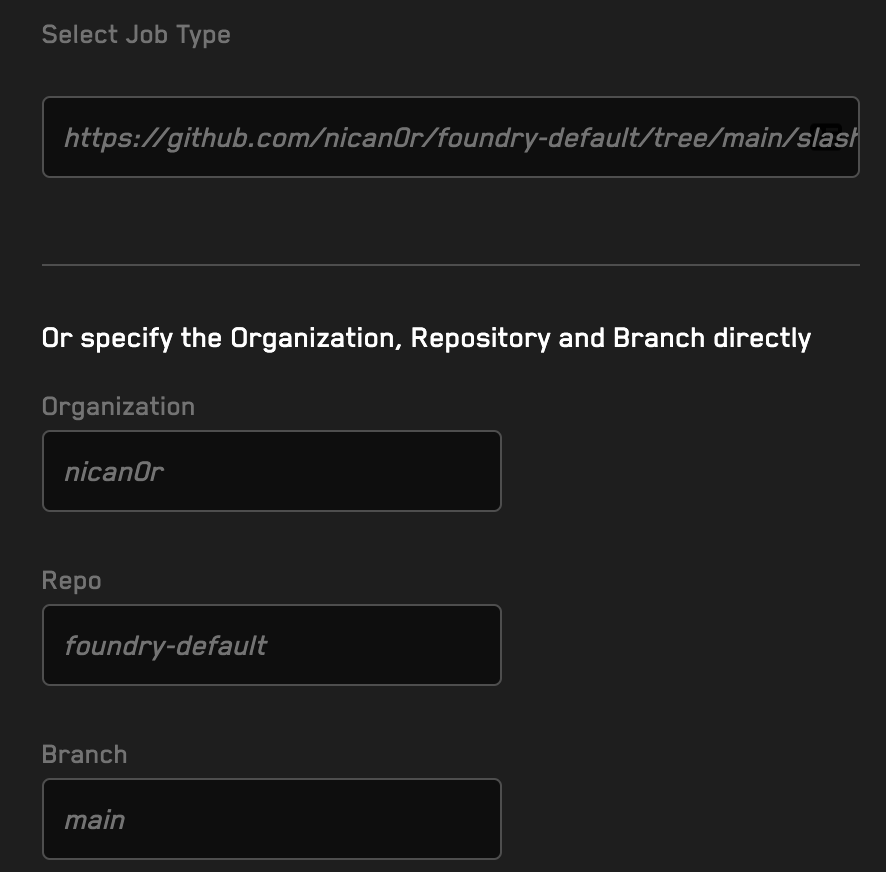
For repositories with a default branch whose name includes a “/” in their name recon will only recognize the leading half of the branch name when autofilling the branch name in the form field. For example, if I have a repository as below whose default branch name is main/slash only main gets recognized and added to the form:
This will throw the following error message at the bottom of the screen if you try to build with the above settings, indicating that the specified branch wasn’t found in the repository:
You will need to specify the full branch name as main/slash and the build will be successfully submitted.
If you've made it this far you value the security of your protocol.
At Recon we offer boutique audits powered by invariant testing. With this you get the best of both worlds, a security audit done by an elite researcher paired with a cutting edge invariant testing suite.
Sound interesting? Reach out to us here:


